Installing a new fender on your car can be a rewarding and cost-effective endeavor, especially with our step-by-step DIY guide. At PaintedAutoParts.com, we prioritize the satisfaction and convenience of our customers, providing high-quality painted fenders for a seamless replacement. Let's dive into the details of how you can successfully install a new fender on your car.
Introduction
Car fenders are not just aesthetic components; they play a crucial role in protecting your vehicle's body and enhancing its overall appearance. When it comes to replacing a damaged or worn-out fender, the task might seem daunting, but with the right guidance, it becomes an accessible and fulfilling DIY project.

PaintedAutoParts.com, your go-to online store for painted spare parts, understands the perplexity car owners face when dealing with damaged fenders. Our commitment is to provide informative and expert advice to empower car enthusiasts and body shops alike. As you read on, you'll discover the simplicity and satisfaction of installing a new fender on your car, all while hinting at the availability of quality painted fenders on our website.
Understanding Your Fender
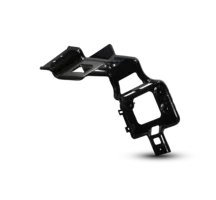
Before diving into the installation process, it's essential to understand the significance of a car fender. More than just a cosmetic element, the fender serves as a protective barrier, shielding your vehicle from road debris, stones, and other potential sources of damage. Choosing the right fender for your vehicle ensures both functionality and seamless integration into its overall design. Furthermore, important is the correct selection of fender components, including trims, hinges, and insulation, which are integral components that contribute to the structural integrity and aesthetic cohesion of the front end of your vehicle.
Preparing for Installation
Necessary Tools and Materials
To embark on this DIY journey, gather the following tools and materials:
- Screwdriver set
- Wrenches
- Safety gloves and goggles
- New fender from PaintedAutoParts.com
- Protective coveralls
Tips for Workspace Preparation
Creating a well-organized and safe workspace is crucial for a successful installation. Consider the following:
- Clear the Area: Ensure you have enough space to move around and access your vehicle from all angles.
- Protective Covering: Use a protective cover or tarp to shield the ground from any potential damage.
- Adequate Lighting: Proper illumination is key. If working in a garage, position additional lights to avoid shadows.
Step-by-Step Installation Guide
Follow this step-by-step guide to install your new painted fender:
Step 1: Assess the Damage
Evaluate the extent of the damage to your current fender and identify the areas that need replacement.
Step 2: Remove the Damaged Fender
Use appropriate tools to carefully remove the damaged fender, starting with the screws and bolts securing it to the vehicle.
Step 3: Compare and Confirm
Before proceeding, compare the newly painted fender with the old one to ensure an exact match in size, shape, and color.
Step 4: Align and Attach
Carefully align the new fender with the existing body structure, then secure it in place using the provided screws and bolts.
Step 5: Double-Check Alignment
Confirm that the new fender sits flush and aligns seamlessly with the adjacent body panels.
Step 6: Test for Sturdiness
Gently shake the installed fender to ensure it is securely attached and won't shift during regular driving conditions.
Step 7: Tighten All Fasteners
Go over all screws and bolts to ensure they are tightened securely, providing a stable and reliable attachment.
Step 8: Conduct a Visual Inspection
Examine the installed fender for any gaps, misalignment, or imperfections. Make adjustments as needed.
Step 9: Perform a Test Drive
Take your car for a short test drive to ensure the new fender withstands various driving conditions.
Step 10: Final Checks
Conduct a final visual inspection and tighten any fasteners that may have loosened during the test drive.
Common Challenges and Solutions
While installing a new fender is generally straightforward, challenges may arise. Here are common issues and expert solutions:
Issue 1: Paint Mismatch
Solution: PaintedAutoParts.com offers an extensive color-matching system to ensure the new fender seamlessly blends with your vehicle's existing paint.
Issue 2: Alignment Problems
Solution: Follow the provided instructions meticulously, and if alignment issues persist, consult professional help to avoid structural damage.
Quality of PaintedAutoParts.com Products
At PaintedAutoParts.com, we take pride in offering top-quality painted fenders crafted to meet the highest standards. Our commitment to providing a precise match to your vehicle's color ensures a seamless integration, enhancing both the aesthetics and value of your car.
Benefits of DIY Installation
Cost Savings
One of the primary reasons car owners opt for a DIY installation is the significant cost savings. Professional installations can be expensive, and choosing to install your fender yourself puts that money back in your pocket.
Customization Opportunities
Installing a painted fender yourself opens up customization possibilities. Choose a color that perfectly matches your vehicle, or even opt for a unique design to make your car stand out.
Personal Satisfaction
There's a sense of accomplishment in completing a project on your own. Installing a painted fender gives you the satisfaction of knowing you contributed to your car's maintenance.
Care and Maintenance Tips
To ensure the longevity and appearance of your newly installed painted fender, follow these care and maintenance tips:
- Regular Cleaning: Wash your car regularly to remove dirt, grime, and other contaminants that can affect the paint quality.
- Avoid Harsh Chemicals: Use car-friendly cleaning products to prevent damage to the painted surface.
- Inspect for Damage: Routinely inspect your fender for any signs of damage or chipping. Address issues promptly to prevent further deterioration.
Customer Testimonials
Don't just take our word for it. Hear what our satisfied customers have to say about their experience with PaintedAutoParts.com's painted fenders:
- “The color match was perfect, and the installation was a breeze. I saved a lot by doing it myself!” — Mark, a satisfied customer.
- “I was skeptical about ordering online, but PaintedAutoParts.com exceeded my expectations. The fender fit perfectly, and the paint quality is exceptional.” — Sarah, car enthusiast.
Additional PaintedAutoParts.com Offerings
While exploring the world of painted fenders, don't forget to check out PaintedAutoParts.com's extensive range of other painted spare parts. From hoods to side mirrors, we have everything you need to keep your car looking and functioning at its best.
Conclusion
In conclusion, installing a new fender on your car is not just a repair task; it's an opportunity to enhance your vehicle's appearance and functionality. With our detailed DIY guide and the quality painted fenders available at PaintedAutoParts.com, you can embark on this project with confidence. The satisfaction of completing a DIY installation, coupled with the affordability and customization options, makes it a worthwhile endeavor.
As you dive into the world of DIY car maintenance, remember that PaintedAutoParts.com is your trusted partner, providing high-quality painted spare parts for your every need. Explore our selection today and elevate your car's style and performance.
