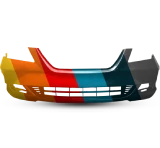


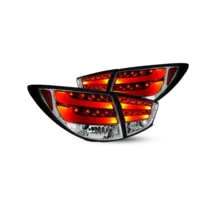


Tackle the task of tail lamp installation with confidence, and shed a new light on your vehicle's visibility and safety. In this guide, we'll walk you through the process, offering expert tips and a seamless step-by-step approach to ensure your tail lamps shine brightly. Let's dive in and illuminate your automotive experience!
Tail lamps are more than just accessories; they are crucial components for ensuring your vehicle is seen on the road, especially in low-light conditions. In this step-by-step guide, we'll empower you to handle the installation yourself, enhancing both the aesthetic appeal and safety of your car.
The Importance of Functional Tail Lamps
Before we embark on the practical journey of installing tail lamps, let's take a moment to illuminate the significance of these seemingly unassuming yet vital components in the automotive world. Tail lamps, often relegated to the role of aesthetic embellishments, play a multifaceted role that extends beyond mere visual appeal. Here's a closer look at why having functional tail lamps is more than just a matter of style.
1. Enhanced Visibility
Tail lamps aren't just there to make your vehicle look sleek; they are integral to improving its visibility on the road. Particularly crucial during low-light conditions, such as dusk or nighttime driving, functional tail lamps ensure that your vehicle remains conspicuous to other drivers. This heightened visibility is a critical element in preventing rear-end collisions and promoting overall road safety.
2. Safety on the Road
The safety implications of properly functioning tail lamps cannot be overstated. Beyond their role as passive visual markers, tail lamps actively communicate your driving intentions to those sharing the road. When you apply the brakes, functional tail lamps promptly signal to following drivers that you are slowing down or coming to a stop. This real-time communication reduces the risk of accidents, contributing to a safer driving environment for everyone on the road.
3. Legal Compliance
It's not just good practice to maintain functional tail lamps; in many regions, it's a legal requirement. Traffic regulations mandate the presence of operational tail lamps to ensure that your vehicle is adequately visible, especially in adverse conditions. Checking and maintaining your tail lamps regularly isn't just about staying on the right side of the law; it's a responsibility that aligns with the broader goal of fostering a secure driving culture.
4. Aesthetic and Technological Evolution
Tail lamps have come a long way from being mere functional elements. Today, they are integral to the overall aesthetic appeal of a vehicle. With advancements in technology, we now have LED tail lamps that enhance visibility and lend a modern and sophisticated look to your car's rear end. Upgrading to these contemporary options isn't just a stylistic choice; it's a pragmatic decision that combines form and function.
5. Enhanced Driving Experience
Beyond the safety and legal aspects, functional tail lamps contribute to an overall enhanced driving experience. Whether you're navigating through city traffic or cruising on an open highway, the peace of mind that comes from knowing your vehicle is well-visible adds a layer of comfort to your journey.
In essence, functional tail lamps are not just components to tick off a checklist during vehicle maintenance. They are silent guardians of road safety, communication facilitators, and aesthetic enhancers that collectively contribute to the holistic driving experience. As we delve into the practical aspects of tail lamp installation, keep in mind that you're not just upgrading a component – you're investing in the safety and visual appeal of your vehicle on the road.
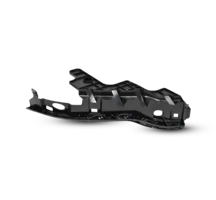
Tools You'll Need for the Job
Screwdriver Set
A versatile set of screwdrivers is indispensable for removing the screws securing the old tail lamps and installing the new ones securely. Different sizes may be required, so having a comprehensive set ensures you're prepared for various screw types.
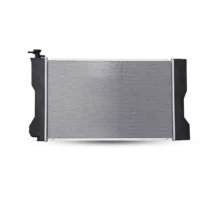
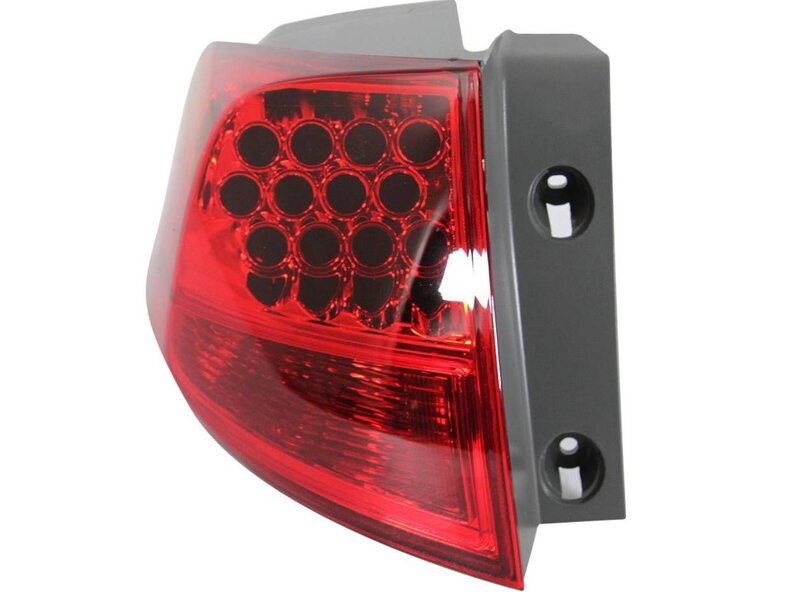
Replacement Tail Lamps
Ensure you have the right replacement tail lamps compatible with your car's make and model. Investing in quality replacements guarantees optimal functionality and longevity, contributing to a safer and well-illuminated driving experience.
Gloves
Wearing gloves during the installation process is more than a precaution; it's a practical necessity. Gloves protect your hands from dirt, oils, and potential cuts, ensuring a clean and safe working environment.
Safety Goggles
Don't overlook the importance of safety goggles. They shield your eyes from debris and dust, providing an extra layer of protection as you work on removing and installing tail lamps. Safety should always be a priority during automotive tasks.
Step-by-Step Guide: Installing Tail Lamps
1. Safety First!
Begin by ensuring your vehicle is parked on a level surface, and the engine is turned off. Engage the parking brake for added safety. Please keep in mind your safety goggles and gloves – they're your trusted allies during this installation.
2. Assessing the Tail Lamp Assembly
Take a close look at your tail lamp assembly. Identify any signs of damage or wear that might necessitate replacement. A thorough assessment guides your approach to the installation process.
3. Choosing the Right Replacement Tail Lamps
Select replacement tail lamps that are not only compatible with your vehicle but also meet your aesthetic preferences. Consider LED options for improved visibility and a modern look.
4. Preparing Your Workspace
Clear the area around the tail lamps to ensure easy access. Use a clean cloth to wipe the assembly and remove any dirt or debris that might hinder the installation process.
5. Removing the Old Tail Lamps
Use the appropriate screwdrivers to carefully remove the screws holding the tail lamp assembly in place. Gently disconnect the wiring, keeping track of the socket positions for the new installation.
6. Installing the New Tail Lamps
Align the new tail lamps with the socket positions and secure them in place. Carefully reconnect the wiring, ensuring a snug fit. Tighten the screws to secure the new assembly in position.
7. Testing and Adjusting
Power up your vehicle and test the new tail lamps. Confirm that they illuminate properly when the headlights are turned on. If adjustments are needed, use the manual to ensure proper alignment.
Choosing the Right Tail Lamps
Selecting the appropriate tail lamps and tail lights for your vehicle involves more than just aesthetics; it's about ensuring safety, visibility, and compliance with regulations. Here's a comprehensive guide on how to make an informed decision when choosing tail lamps and tail lights:
- Identify Your Vehicle's Requirements: Consult your vehicle's manual to understand the recommended specifications for tail lamps and tail lights. Note the bulb type, size, and any specific features required for your make and model.
- Understand the Different Types: Tail lamps and tail lights come in various types, including traditional incandescent bulbs, LEDs, and halogens. LEDs are popular for their energy efficiency and longer lifespan. Consider the type that aligns with your preferences and driving needs.
- Evaluate Brightness and Visibility: Assess the brightness of the tail lamps, measured in lumens. Opt for options that provide ample illumination to ensure your vehicle is visible to other drivers, enhancing safety on the road.
- Consider the Aesthetic Appeal: While functionality is paramount, tail lamps contribute to your vehicle's overall aesthetics. Consider styles that complement your car's design and express your personal taste. Modern LED options often provide a sleek and contemporary look.
- Check Regulatory Compliance: Different regions have specific regulations regarding tail lamps and tail lights. Ensure that your chosen components comply with local traffic laws to avoid legal issues and ensure road safety.
- Compatibility with Your Vehicle: Confirm that the selected tail lamps are compatible with your vehicle's make and model. Check the fitment details and specifications to guarantee a seamless installation and optimal performance.
- Evaluate Housing Materials: Tail lamp housings are typically made of materials like plastic, glass, or polycarbonate. Consider the climate and driving conditions in your area when choosing housing materials for durability and optimal light distribution.
- Additional Features: Modern tail lamps may come with extra features such as sequential lighting, dynamic turn signals, or integrated backup lights. Evaluate these features based on your preferences and the technological capabilities you desire.
- Check Customer Reviews: Research customer reviews and testimonials for specific tail lamp models. Real-world experiences provide valuable insights into the performance, durability, and customer satisfaction associated with a particular product.
By considering these factors, you can confidently choose tail lamps and tail lights that not only meet the functional requirements of your vehicle but also enhance its safety, aesthetics, and overall driving experience. If you're ready to explore a range of quality tail lamps, our online store offers various options to suit your preferences and requirements. Illuminate your journey with the perfect tail lamps for your vehicle.
Expert Tips for a Seamless Experience
- Bulb Replacement Tip:
- When replacing tail lamp bulbs, handle them with gloves to prevent oils from your skin affecting their lifespan.
- Tool Choice Matters:
- Invest in quality tools. A good screwdriver set and clean workspace can make the installation smoother.
- Consider Professional Help:
- If you're uncomfortable with any step, don't hesitate to seek professional assistance. It's better to ensure the job is done right.
Frequently Asked Questions about Tail Lamp Installation
- How to Install Tail Light Covers?
- Tail light covers can be a stylish addition. Follow the manufacturer's instructions for a hassle-free installation.
- How to Install Sequential Tail Lights?
- Sequential tail lights add a unique touch. Consult the provided guide or seek professional installation for a precise setup.
Conclusion
Congratulations! You've successfully navigated the step-by-step process of tail lamp installation. By taking this initiative, you've enhanced your vehicle's aesthetics and contributed to its safety on the road. If you're considering where to find quality replacement tail lamps for your next project, our online store offers various options. Illuminate your drive and enjoy the renewed visibility.