


Prepare to embark on a journey toward pristine driving visibility with our expert guidance on replacing your vehicle's windshield washer fluid reservoir. As a pivotal component ensuring unobstructed vision on the road, the windshield washer fluid reservoir deserves meticulous attention and maintenance. In this extensive guide, we'll unveil a step-by-step approach to effortlessly replace this indispensable part, guaranteeing uninterrupted clarity and safety for your future travels. Join us as we navigate through this intricate process, empowering you to uphold optimal visibility and drive with utmost confidence.
Assessing the Situation
Before delving into the replacement of your car's windshield washer fluid reservoir, it's paramount to conduct a comprehensive assessment of its condition. This ensures that any underlying issues are addressed before proceeding with the replacement. Here's a breakdown of the steps involved in this assessment:
a. Visual Inspection:
Start by visually inspecting the exterior of the windshield washer fluid reservoir. Look for any visible signs of damage, such as cracks, dents, or leaks. Pay close attention to areas prone to wear and tear, like seams and edges, where cracks may develop over time. Additionally, check for any discoloration or staining around the reservoir, which could indicate leaks or fluid seepage.
b. Fluid Level Check:
Next, check the fluid level inside the reservoir. If the reservoir is transparent, you can visually inspect the fluid level directly. Otherwise, use the provided dipstick or level indicator to gauge the fluid level accurately. Ensure that the fluid level meets the recommended standards for optimal functionality of the windshield washer system.
c. Functional Testing:
Take your assessment further by testing the functionality of the windshield washer fluid system. Activate the system from inside the vehicle and observe its performance. Pay attention to the flow of fluid onto the windshield and listen for any unusual sounds or vibrations from the washer pump. Any abnormalities in fluid flow or sound may indicate underlying issues with the reservoir or pump.
d. Leakage Detection:
Conduct a thorough examination of the area surrounding the windshield washer fluid reservoir to detect any signs of leakage. Look for puddles or dribbles of washer fluid beneath the reservoir or along the fluid lines. Additionally, check for moisture or dampness on nearby components like the radiator or engine bay. Even minor leaks can lead to fluid loss over time, compromising the efficiency of your washer system.
e. Assessment of Mounting Hardware:
Conclude your assessment by inspecting the mounting hardware securing the reservoir in place. Ensure that all bolts, clips, and brackets are intact and properly tightened. Loose or missing fasteners can cause the reservoir to become unstable or dislodged while driving, posing a safety hazard. Replace any damaged or missing mounting hardware along with the reservoir if necessary.
By conducting a thorough assessment of your car's windshield washer fluid reservoir, you can identify any potential issues and address them promptly to ensure clear visibility and safe driving on the road. If you encounter significant problems during the assessment process, it's advisable to seek professional assistance to properly diagnose and address the issue.
Gathering the Necessary Tools and Materials
To replace your windshield washer fluid reservoir, you'll need the following tools and materials:
- Screwdriver or socket wrench set
- New windshield washer fluid reservoir (available at paintedautoparts.com)
- Replacement washer fluid hose (if needed)
- Replacement washer fluid pump (if needed)
- Safety goggles and gloves
Locating the Reservoir
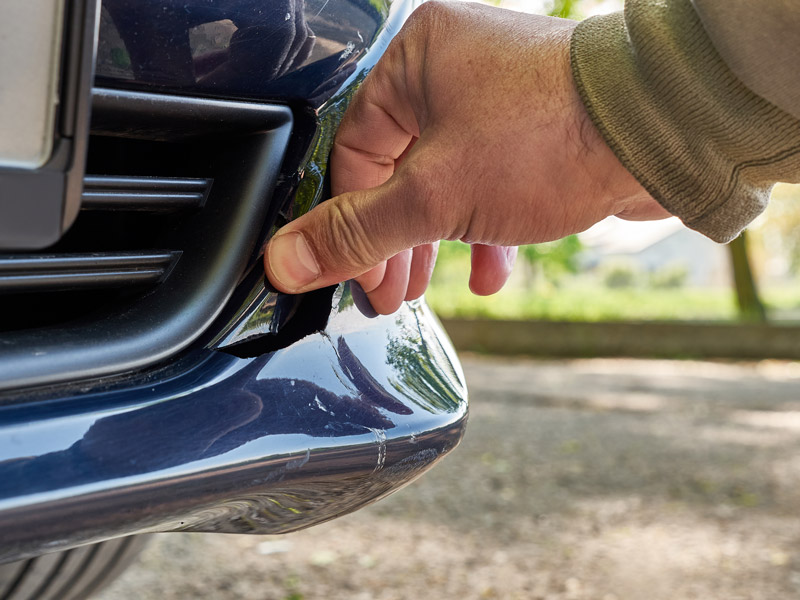
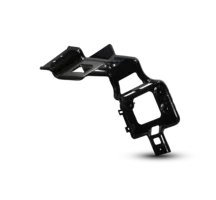
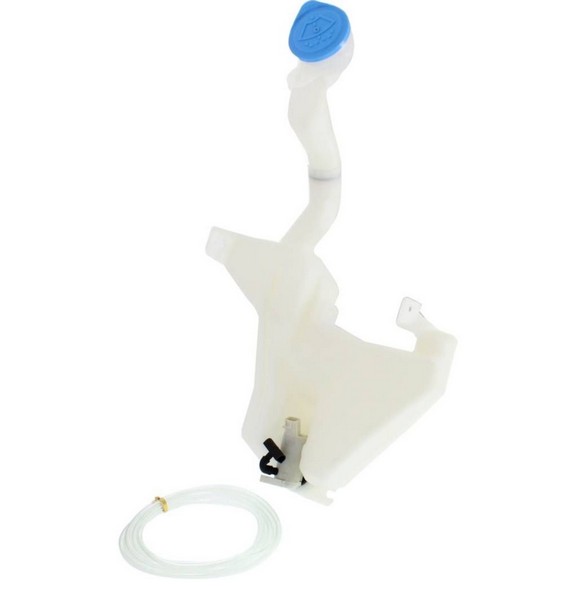
Unraveling the whereabouts of the windshield washer fluid reservoir marks a crucial initial stride before delving into the replacement endeavor. While its exact positioning may fluctuate contingent on your vehicle's make and model, it typically nestles near the front of the engine bay, proximate to the windshield. Predominantly, it resides beneath the hood, conveniently ensconced on the driver's side of the engine compartment, adjacent to the firewall.
Identifying the reservoir is typically a straightforward task – it's often ensconced within a translucent or opaque plastic tank, accompanied by affixed hoses. If uncertainty clouds its precise location, resorting to your vehicle's owner's manual or leveraging online resources can furnish invaluable aid. These reservoirs frequently encompass elaborate diagrams or tailored descriptions aligned with your specific car model, facilitating precise reservoir identification. Armed with this insight, you'll confidently pinpoint the windshield washer fluid reservoir, setting the stage for a seamless replacement process.
Draining the Fluid
Before embarking on the removal of the old windshield washer fluid reservoir, it's imperative to evacuate any lingering fluid to thwart potential messy mishaps and leaks. This fundamental yet pivotal step ensures a seamless replacement process. Kick-off by pinpointing the drain plug or valve stationed at the reservoir's base. Armed with a suitable container to capture the fluid, cautiously unfasten the drain plug or valve to facilitate a complete fluid discharge. Once the reservoir is purged, securely fasten the drain plug or valve to forestall any residual fluid seepage.
Removing the Reservoir
With the reservoir drained of its contents, it's time to bid farewell to the old windshield washer fluid reservoir nestled within your vehicle. Begin this farewell journey by identifying and disconnecting any electrical connectors or hoses attached to the reservoir. Armed with the necessary tools – a socket wrench or screwdriver – skillfully loosen and disengage the bolts or fasteners securing the reservoir in place. Once these connections are freed, gently lift the reservoir from its housing, taking care to avoid damage to nearby components or hoses.
Disconnecting the Components
Having successfully removed the reservoir from the vehicle, the next critical step is to disconnect any associated components, such as the washer fluid hose and pump, in preparation for their reinstallation.
Before proceeding further, it's essential to sever all connections between the windshield washer fluid reservoir and its associated components. Start by identifying any electrical connectors, such as wiring harnesses or sensor connectors, and delicately detach them. Then, locate the hoses connected to the reservoir, and using pliers or a clamp removal tool, loosen the hose clamps. Once loosened, carefully detach the hoses from the reservoir, ensuring no residual fluid spills during the process.
Installing the New Reservoir
Now that the old reservoir has been removed, it's time to introduce its replacement. Here's a comprehensive guide on how to seamlessly accomplish this task:
- Preparation: Before delving into the installation process, meticulously inspect the new reservoir to ensure it's the correct replacement part and devoid of any defects. Additionally, ensure that the mounting area in the engine bay is free of debris and thoroughly cleaned.
- Positioning: With careful precision, position the new reservoir into the designated mounting area. Ensure perfect alignment with the mounting holes and snug placement against the mounting surface. Take note of any alignment marks or indicators on the reservoir for precise positioning.
- Reconnecting Components: Kickstart the installation journey by reuniting the components. Begin by reconnecting the hoses to the pristine reservoir. Slide the hose ends onto the designated fittings, ensuring a snug fit, and securely fasten them with hose clamps. This meticulous approach ensures a seamless connection and guards against any unwelcome leaks that might compromise your windshield washer system's efficiency.
- Electrical Connections: If the reservoir is equipped with electrical connectors such as sensors or pumps, reconnect them to their respective wiring harnesses. Ensure that the connectors are firmly seated, and engage any locking mechanisms to prevent displacement.
- Securing the Reservoir: With all components properly connected, utilize the mounting hardware provided with the new reservoir to firmly secure it in place. Tighten the mounting bolts or screws evenly to ensure a secure anchorage of the reservoir.
- Fluid Refill: Once the reservoir is securely installed, refill it with windshield washer fluid following the manufacturer's instructions. Keep a vigilant eye out for any leaks around the connections and hoses, promptly addressing any issues that arise.
By meticulously adhering to these steps, you'll effortlessly install a new windshield washer fluid reservoir, ensuring the smooth and efficient operation of your vehicle's washer system.
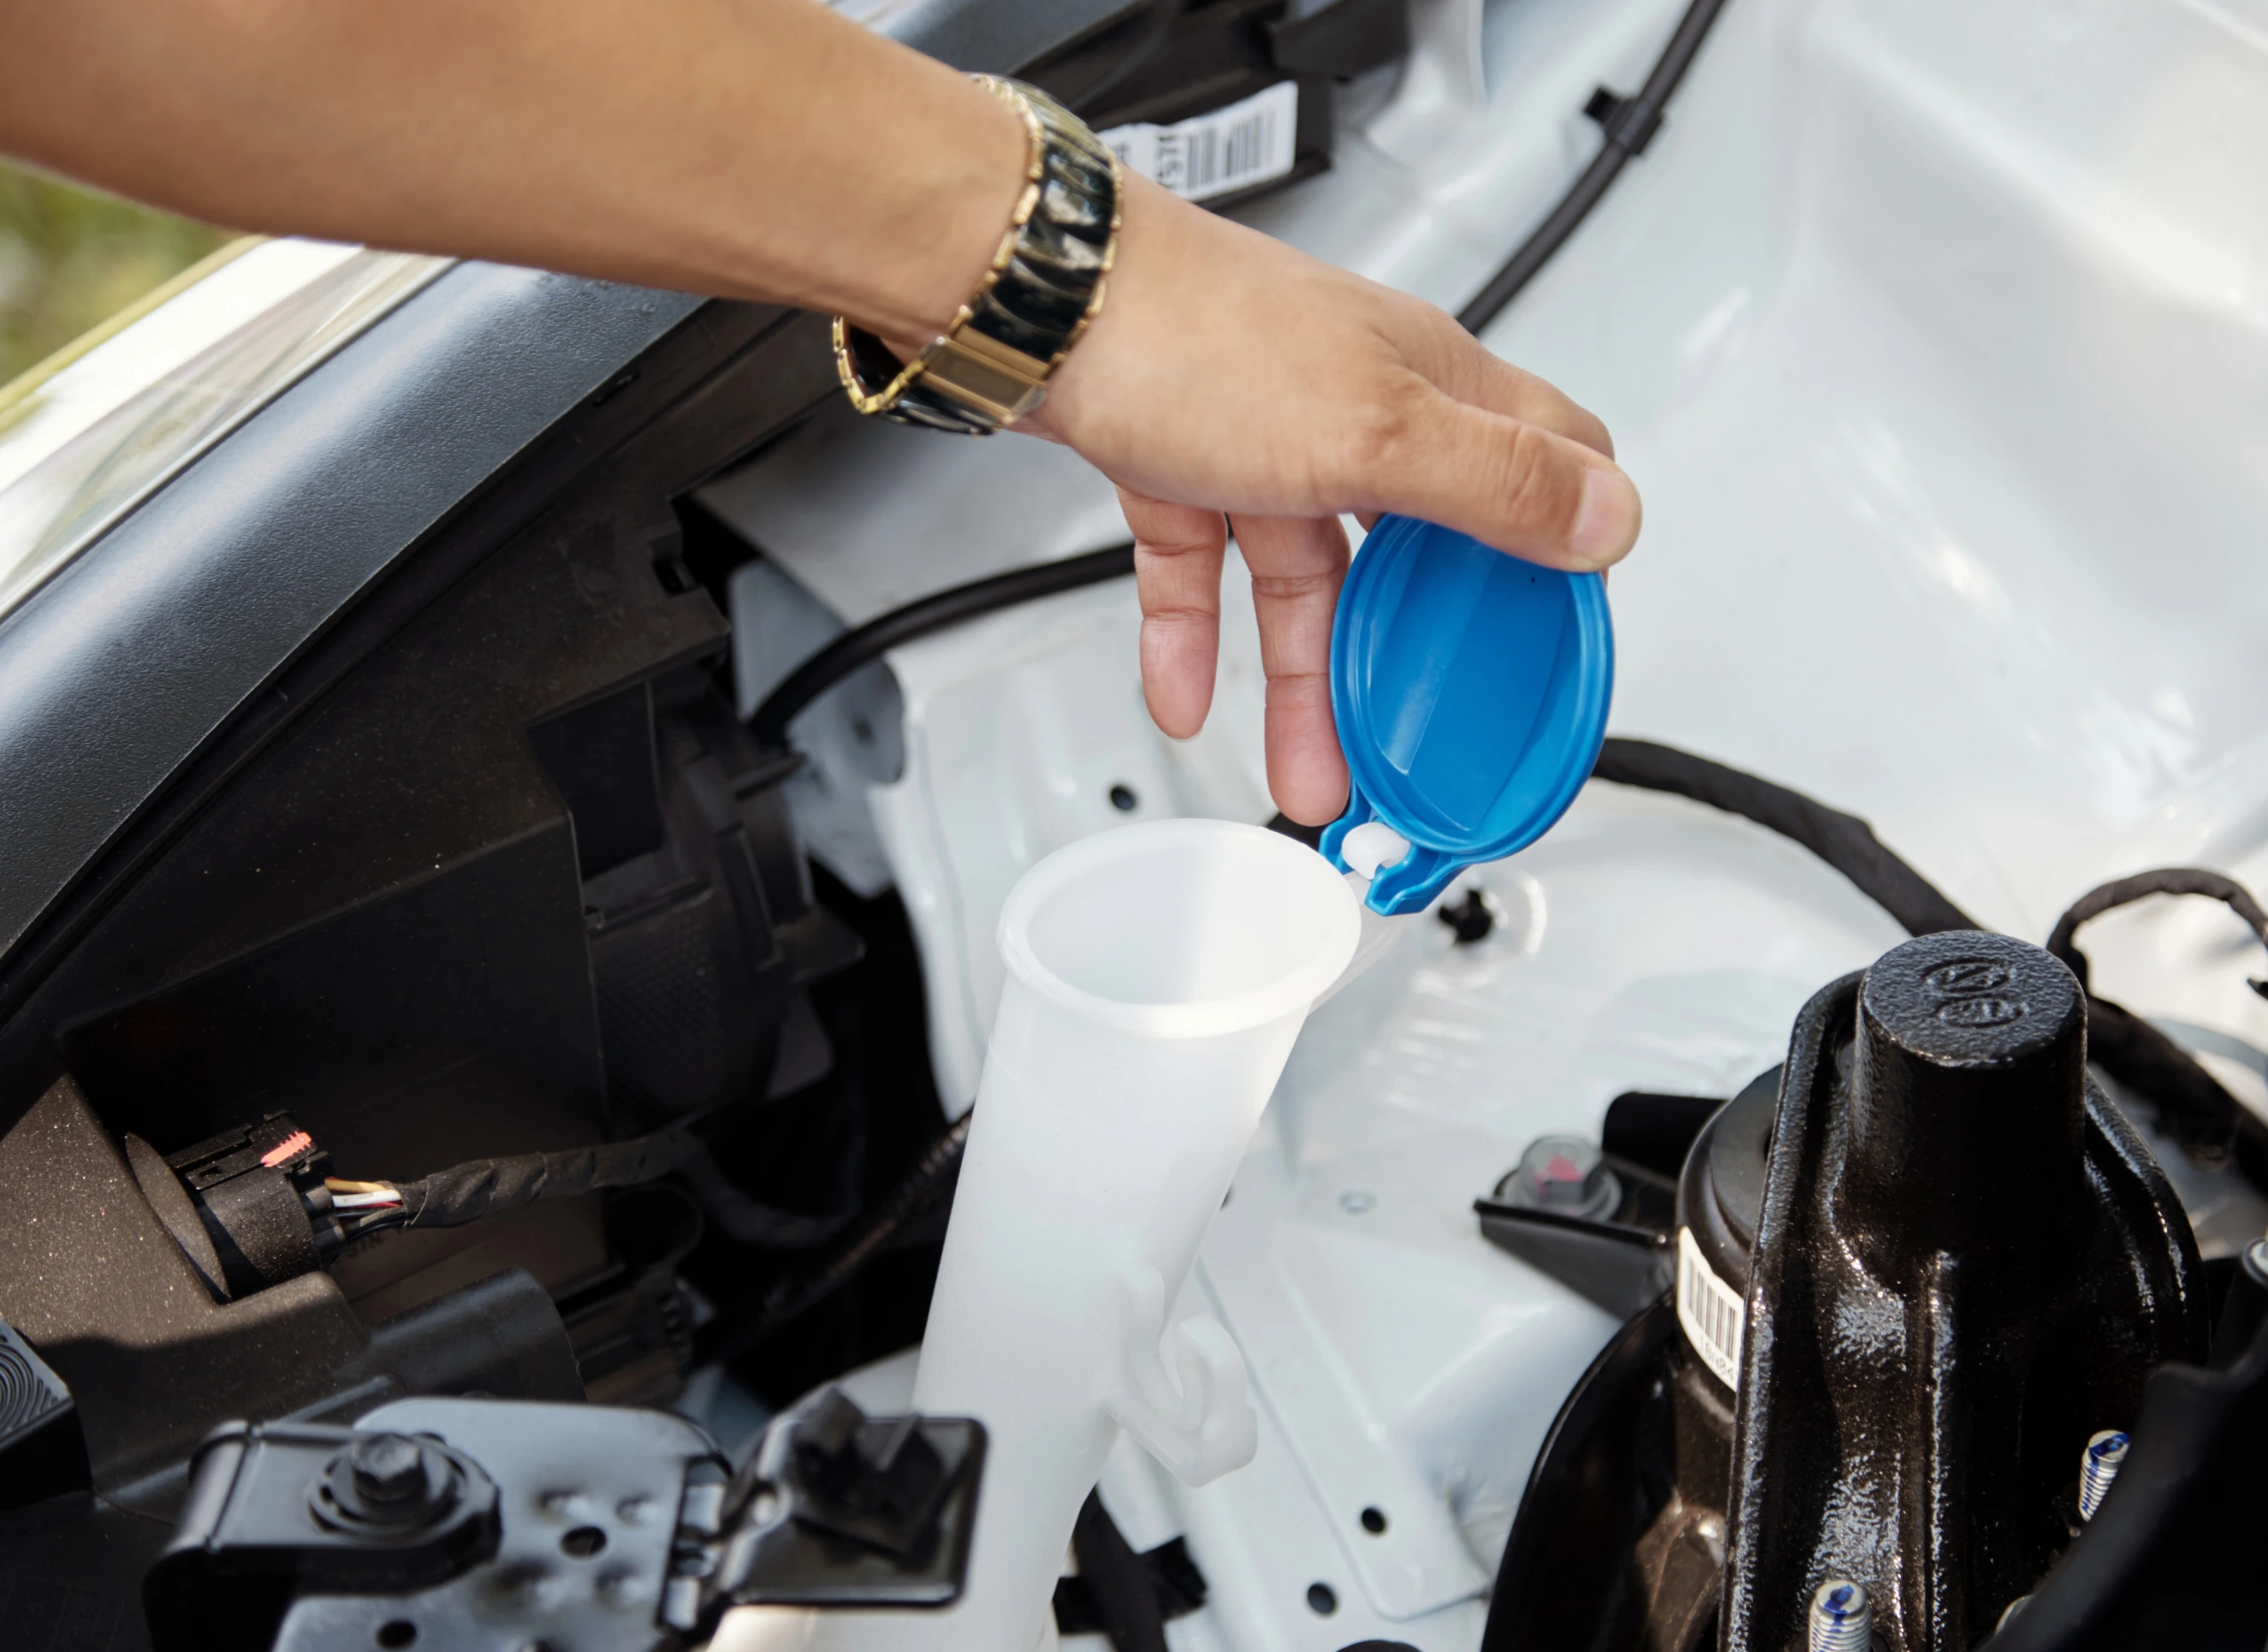
Refilling the Fluid
With the new reservoir securely installed, it's time to replenish it with windshield washer fluid to ensure peak performance. Follow these steps for a seamless refill process:
- Reservoir Access: Begin by opening the reservoir cap to access the interior. Ensure that the area around the cap is clean to prevent any debris from entering the reservoir.
- Fluid Refill: With the cap removed, carefully pour windshield washer fluid into the reservoir until it reaches the recommended level. Keep an eye out for any markings on the reservoir indicating the optimal fluid level.
- Avoid Overfilling: Exercise caution to prevent overfilling the reservoir, as this can result in spills and leaks. Maintaining the fluid at the recommended level is crucial for optimal functionality without any issues.
- Secure Cap Replacement: Once the reservoir is adequately filled, securely replace the cap to prevent contamination and evaporation of the fluid. Ensure that the cap is tightly sealed to maintain the integrity of the washer fluid.
By following these steps, you'll efficiently refill the windshield washer fluid reservoir, ensuring optimal functionality and clear visibility on the road ahead.
Final Checks and Adjustments
Before wrapping up the replacement procedure, it's vital to conduct some last-minute checks and tweaks to guarantee everything is in perfect order. Give all connections and fasteners a thorough once-over to verify they're tightly secured and properly aligned. Take a close look at the new reservoir to ensure there are no signs of leaks or irregularities that may have been overlooked. Dedicate a moment to tidy up any spilled fluid or debris in the engine bay, ensuring a clean finish. Finally, firmly shut the hood of your vehicle and give it a solid tap to ensure it's securely latched. With these meticulous final checks and adjustments completed, you can rest assured that your windshield washer fluid reservoir replacement was executed flawlessly.
Conclusion
By adhering to this detailed guide, you can effortlessly swap out your vehicle's windshield washer fluid reservoir, guaranteeing unobstructed visibility during your travels. Always prioritize safety measures as you proceed, and seek assistance from a specialist if faced with any hurdles. For top-notch replacement components, such as windshield washer fluid reservoirs, explore the selection available at paintedautoparts.com. Ensure your driving experience remains safe and clear by maintaining optimal visibility with quality parts from Painted Auto Parts.